The Wood !
As I explained on my About me page, my “first” skateboard since I really got into skateboarding was made from a sheet of thick plywood (with sandpaper glued with double-sided self-adhesive as griptape). But that’s not the one I’m going to talk about in this post. I’m going to talk about my first (and only, for the moment.) homemade skateboard deck made from maple veneer, which features concave and tails.
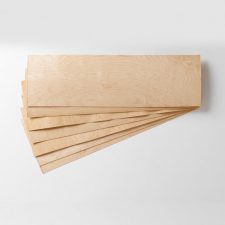
In order to build a skateboard deck, one need the adequate material : wood veneer. At first I tried to find local sourced veneer but I couldn’t find one that was at the same time thick enough, long enough and made from a good hardwood. I live in a part of the country where for some reason you can’t even find birch plywood, so finding some (good) veneer was an impossible mission.
I even contacted the man behind Akasha boards, who lives not far from me, to know where he got his beech veneer. Unfortunately his supplier required a minimum order of thousands of Euros.
So I ended buying my plies from roarockit.eu which allowed me to get correct sized veneer with cross grain sheets included, ready to be glued on. They were the cheapest veneer I could find online, and still made from Canadian hard maple wood.
I bought the 4 decks pack that they used to sold but I omitted the vacuum press as I had my own idea on how to press my home made deck. I got enough wood to make 4 decks for 92,50€ shipping included, about 23€ of wood per deck. I know that I could have found decks for about the same price, but I wanted to build my own.
Size and Shape
Width and Wheelbase
In order to have a correct custom sized board, I made some research. I quickly realized that most skateboarder don’t even know the size of the board they ride, let alone knowing what is a wheelbase. That’s fine, you don’t need to know all the technical things to be a great skateboarder, but it doesn’t help me build my board.
I found many good information on one of the blog that motivated me to write this one : Skateboarding Is My Lifetime Sport. And exchanged some emails with the main author. I used the information he gave me about the relation between a rider height, his feet size and his style with the width and wheelbase of his deck.
I used those two relations :
- Width : between 80 and 85% of the foot length.
- Wheelbase : Distance between shoulder bones + 3.8 cm (1.5″).
My feet are 25,5cm longs (~10″) so my board width will be 8,25″ and my shoulder bones distance is 34 cm (13,3″) so my wheel base will be 37,8cm (~15″).
That’s a standard size so I guess I’m standard sized after all.
Shape
First I wanted to go for a 80’s shaped deck, I’m a big fan of shaped deck but as I was (and still am) a beginner so I decided that I should first go for a popsicle shaped deck. For more versatility.
The Nose and the Tail
Now that I had the wheelbase and the width of the deck I had to decide the length of both the tail and the nose. To do so I decided to use the measurements given by Powell Peralta which I believe are standard.

The Press
In order to make my deck I had to find a way to press the wood plies together on a mold while the glue dries. The mechanical press are the most efficient but also the hardest to make and more adapted to batch production. I saw on the internet some press that used concrete molds and car jacks made by “amateurs” that could be used to produce several boards a day using the same mold.
I decided to use the same kind of vacuum press that is sold by Roarockit, but homemade. To do so I used the vacuum bags made for storing clothes, they are more delicate but also very cheap and disposable.
As a pump I found out that the pump sold by Roarockit was exactly the same as the Vacuvin Wine Saver so I ordered one on Amazon.
I tried to bend thin plywood with one of those cheap vacuum bags and the Vacuvin pump and it worked well, also it seemed to maintain the vacuum for long enough for the glue to dry.
The Mold
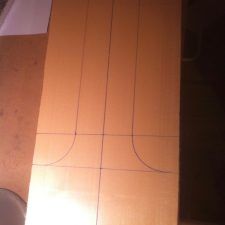
Then I needed to make the mold. I watched Roarockit video on how to make a mold which helped me what my mold had to look like.
I decided to use the specs from Powell Peralta again for the concave and tails angles and I made an accurate plan on SolidWork of the mold needed to bend the wood and then printed it full-scale.
Then I took a piece of extruded polystyrene and reported the plan on it.
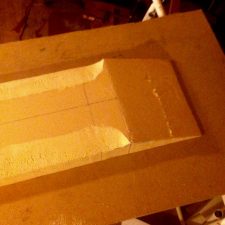
With a saw, a knife, a rasp and many other tools I shaped it and then I was ready to build my deck. It looks a bit rougher on the picture that it does in real life.
Actually making the deck
Laminating and shaping a skateboard deck
I simply laid the sheets on the mold with a thin coat of waterproof grade good quality wood glue on both sides (except for the first and last sheet of course), put some elastic bands to be sure the wood doesn’t move and then put it into the vacuum bag.
I then pumped all the air I could from the bag using the Vacuvin pump until I could hear the “click” sound of the pump, which mean there is “complete” vacuum.
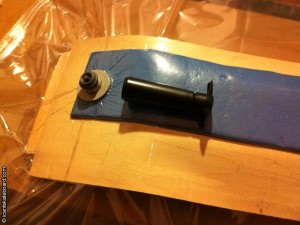
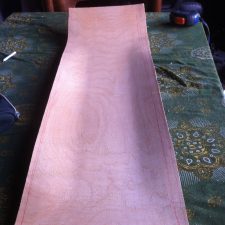
Then I used my bandsaw, a plane and various hand tools to get the shape I wanted. I also sanded the whole deck smooth.
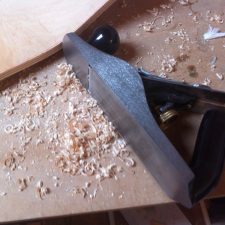
Finishing the deck
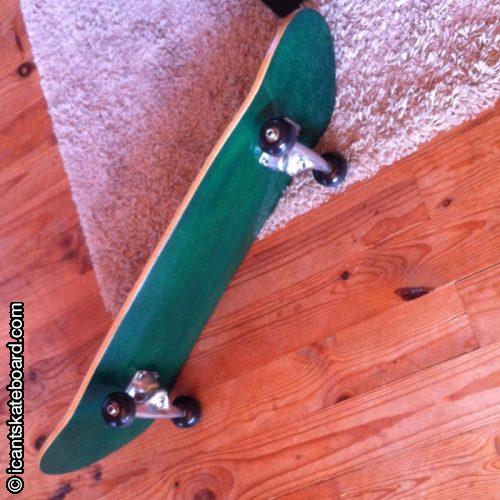
The next step was to apply a finish to the deck. I first applied black ink to the bottom of the deck (It makes the wood grain stand out more) and then green dye. I use the same technique as when I’m finishing a guitar and it usually looks great on maple.
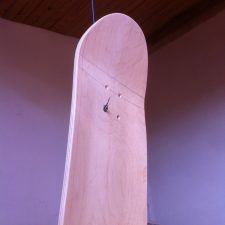
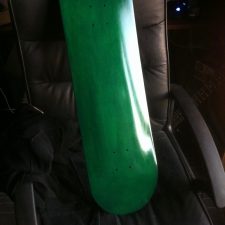
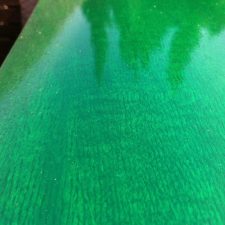
And then it was only a matter of bolting my newly acquired Mini Logo trucks on it and some griptape and voilà, I had my own homemade custom skateboard.


What Vacume Bag did you use???
Thks
I was needing this wonderful information. Thank you for describing this deeply.
A beautiful definition. I am totally inspired.