
Replacing Carver CX Kingpin
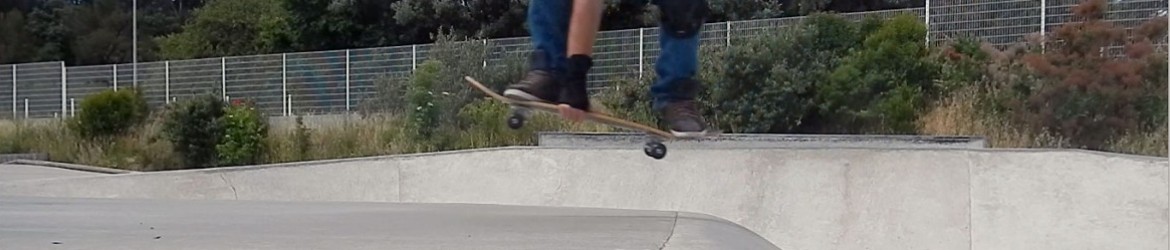
As I explained in my Carver CX Review, something I didn’t like was the kingpin sticking out and hitting coping or curbs. I had a great email exchange with Neil Carver (who designed the truck) about it. He told me “Flipping the kingpin is a very good solution” but he also warned me that “It’s dangerous and you could break the base if something goes wrong. How’s that for fair warning? “.
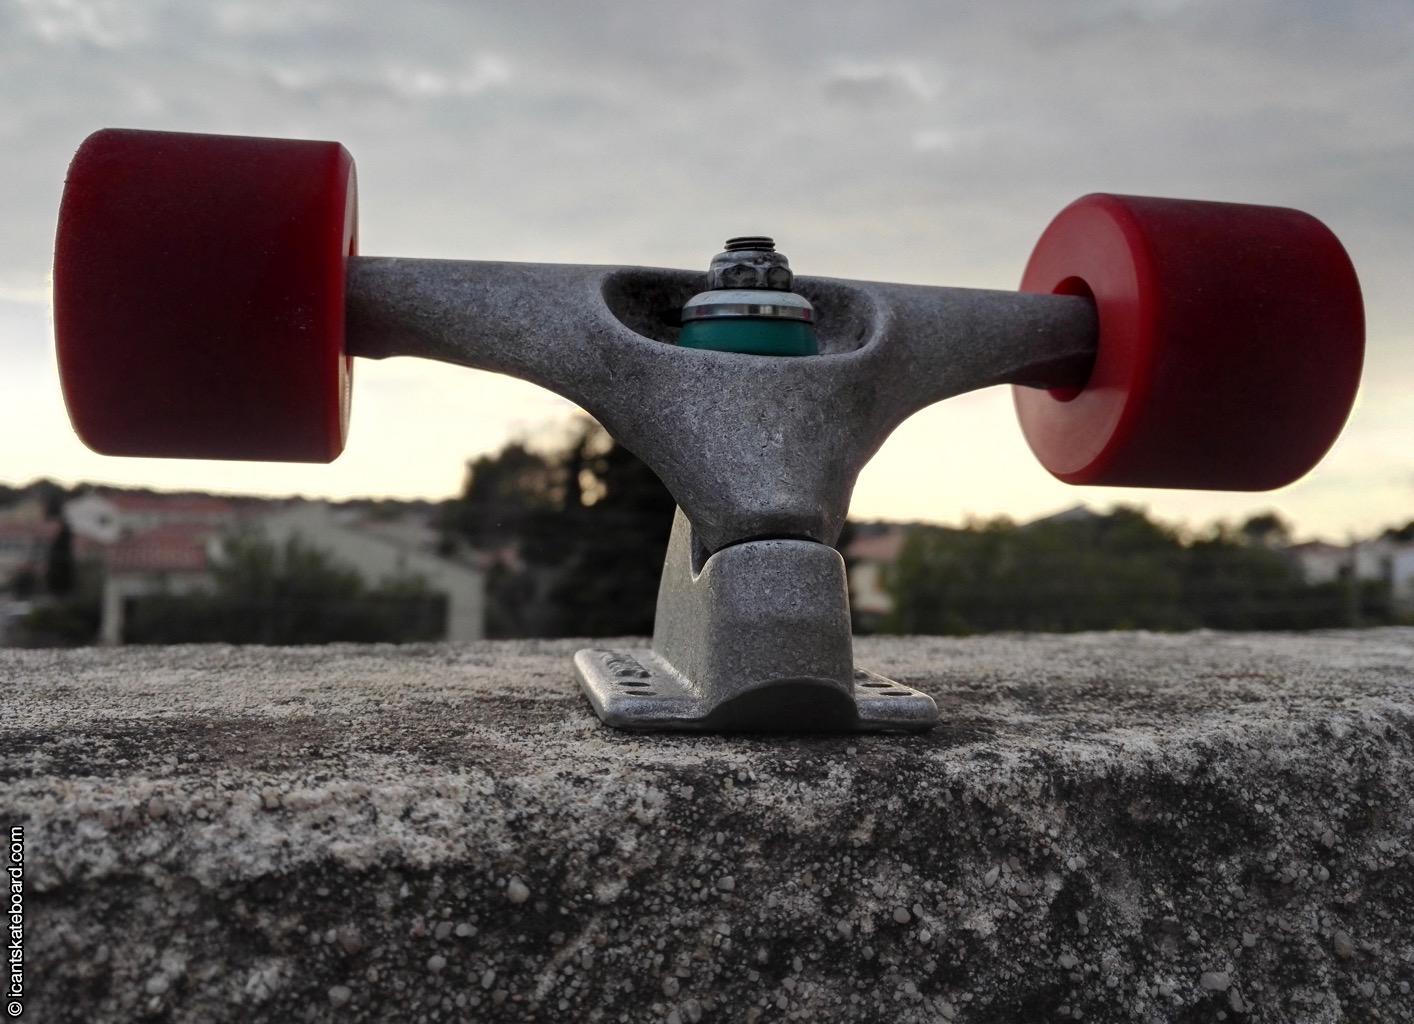
Nonetheless I decided not only to flip my kingpin but also to change it for a DIY metric hex button head one. It is made of metric Class 10.9 steel which is a bit stronger that Grade 8 steel. It is also a little bigger in diameter so the base will need to be redrilled and going back to imperial kingpin will be difficult or even impossible.
As it is a button head screw, only the rounded head will stick out. And as the kingpin is tightened it will get even lower. If the kingpin head is still sticking out, you just have to use smaller road-side bushings for the screw head to sit lower. It’s be similar to the kingpins used by Surf-Rodz. Another advantage is that an allen key is to tighten the trucks and I like that. Note that bushings will be much tighter on the kingpin and sometime harder to get out.
Parts and tools list
For this modification you will need :
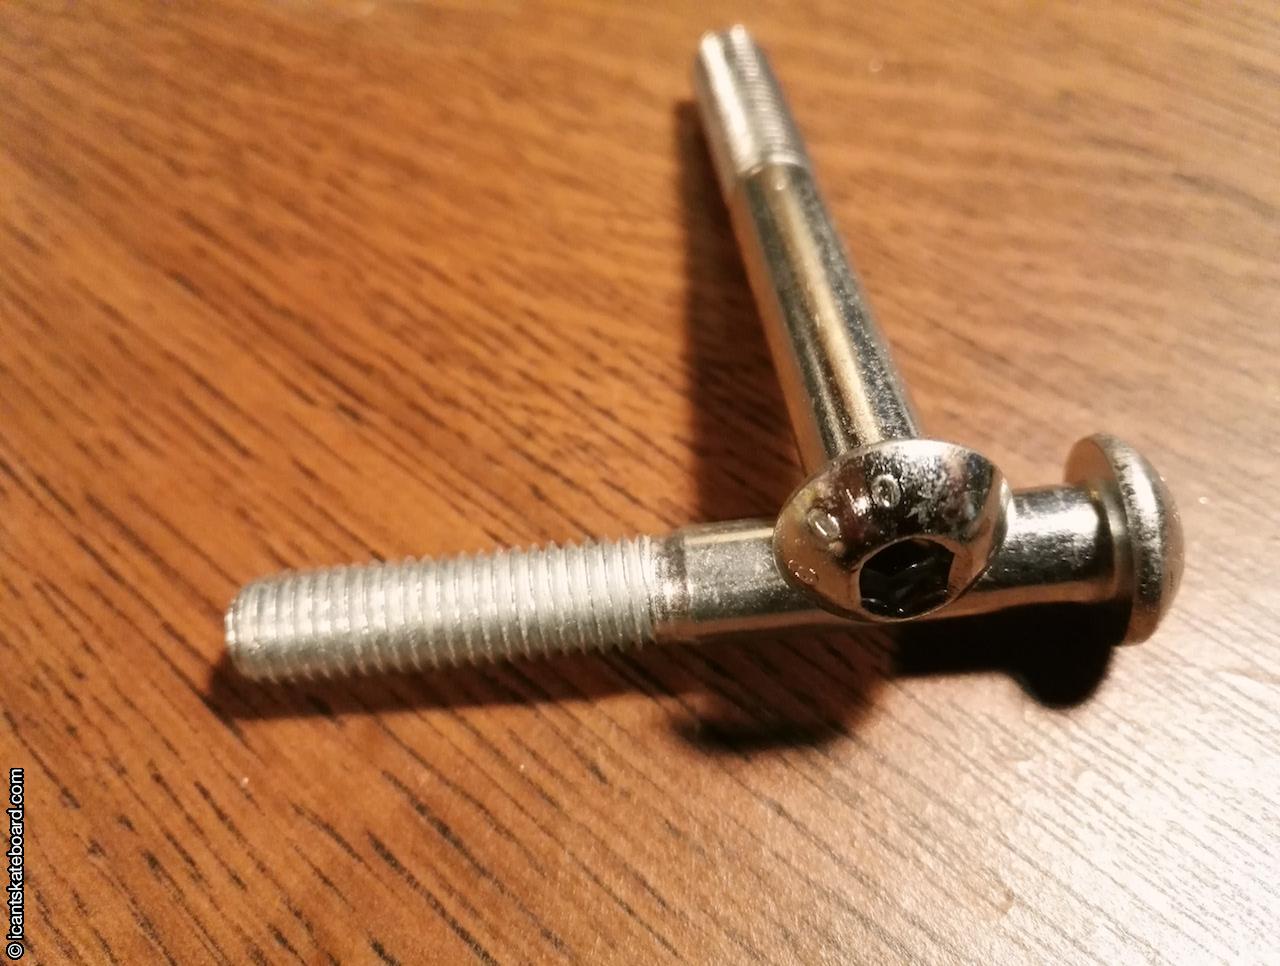
- A new kingpin – If you can’t source a suitable one I can sell you one at the same price I get them.
- A good hammer – the heavier, the easier
- Some files and sandpaper if you are using a metric nut – a belt or disc sander is better (and faster).
- Blocks of wood to raise the base
- Eventually some lubricant to help the kingpin out – I didn’t need it
- A M10 drill bit if you are using a metric kingpin
- Some basic tools
Instructions
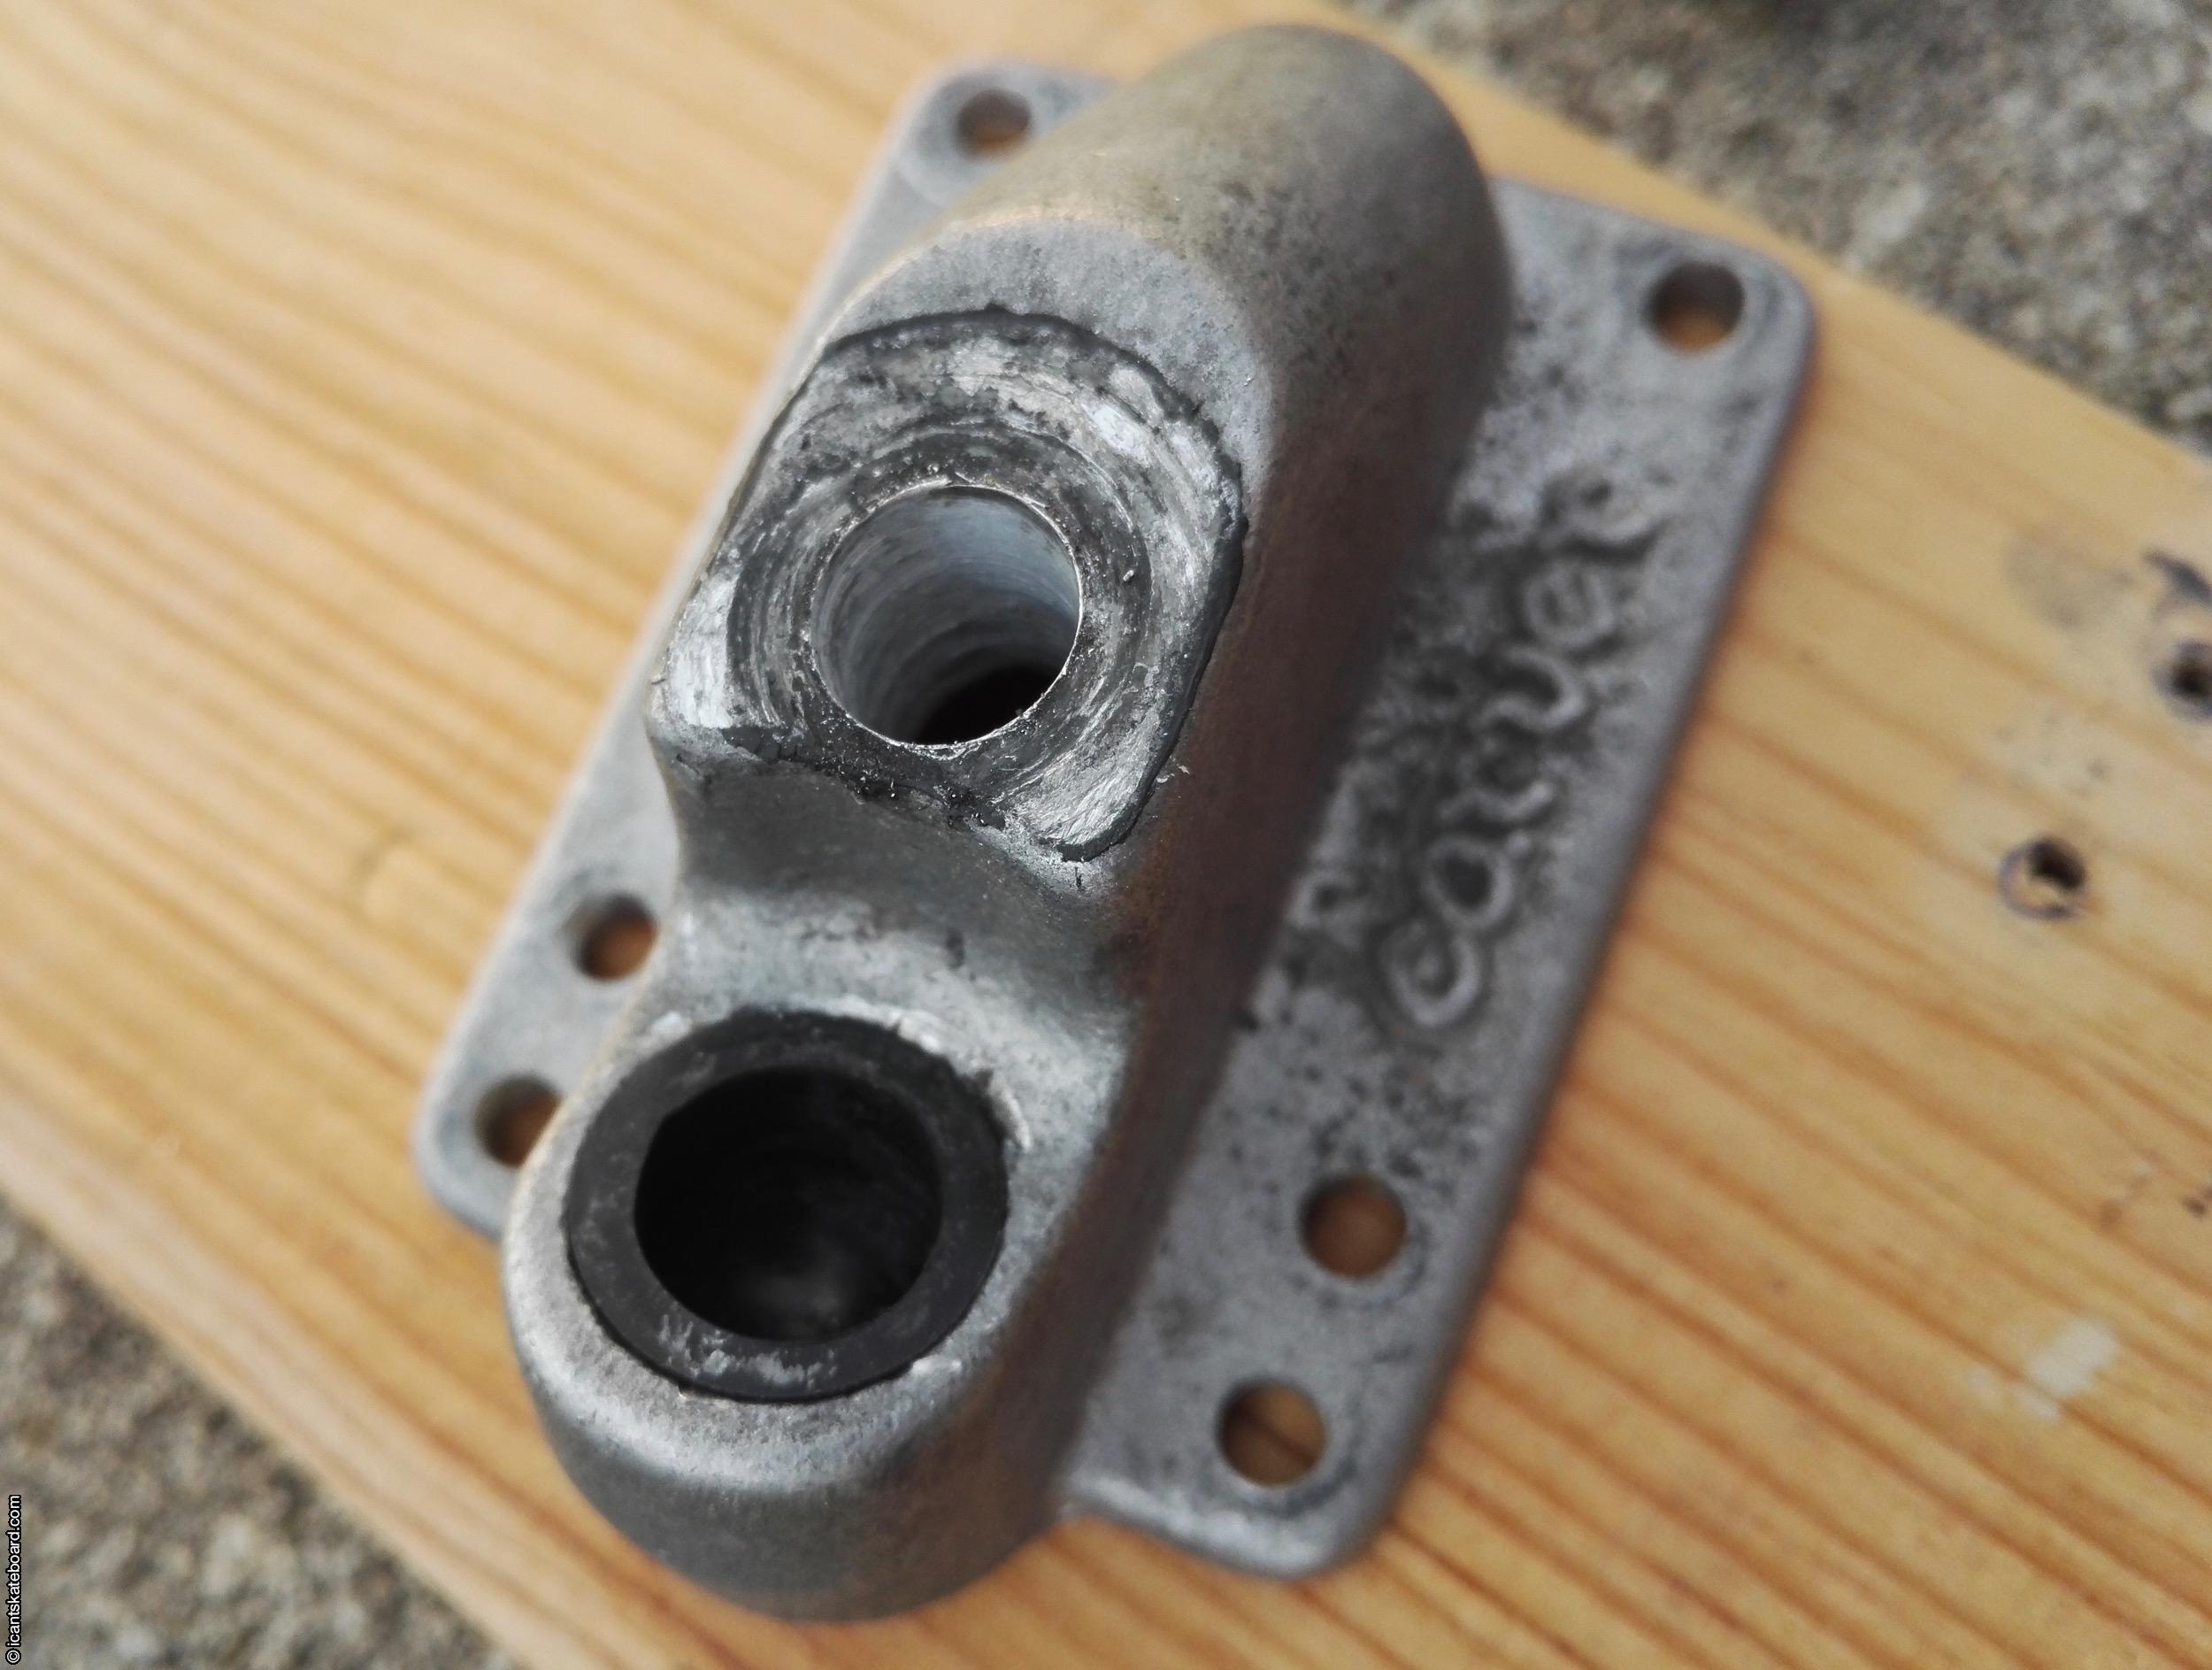
- Kingpin extraction. Put the base of the truck on two blocks of wood, be sure to have enough clearance under it to let the kingpin out. Keep the nut at the end of the kingpin to protect the threads and get a wider surface for the hammer. Now take your hammer and it the kingpin hard until it gets out. It can help to put some lubricant on the kingpin.

This way the hammer has a good surface to hit and the kingpin won’t hit the work surface - Redrilling the base (optional). To get the 10mm kingpin to fit inside the hole it needs to be redrilled. To do that I just used my cordless drill and a wood drill bit (works well on aluminium) at low speed. You need to make sure the hole is centered.

Don’t forget to clean the baseplate afterward as the aluminum chips may damage the bushings. - Fitting the nut in the baseplate. If you are using an imperial nut, it should fit snugly enough not to move. If it does, just use some epoxy to fix it. As I’m using a metric one, it is just a little too big to fit. I used my belt sander to remove enough material to get a tight fit in the baseplate.
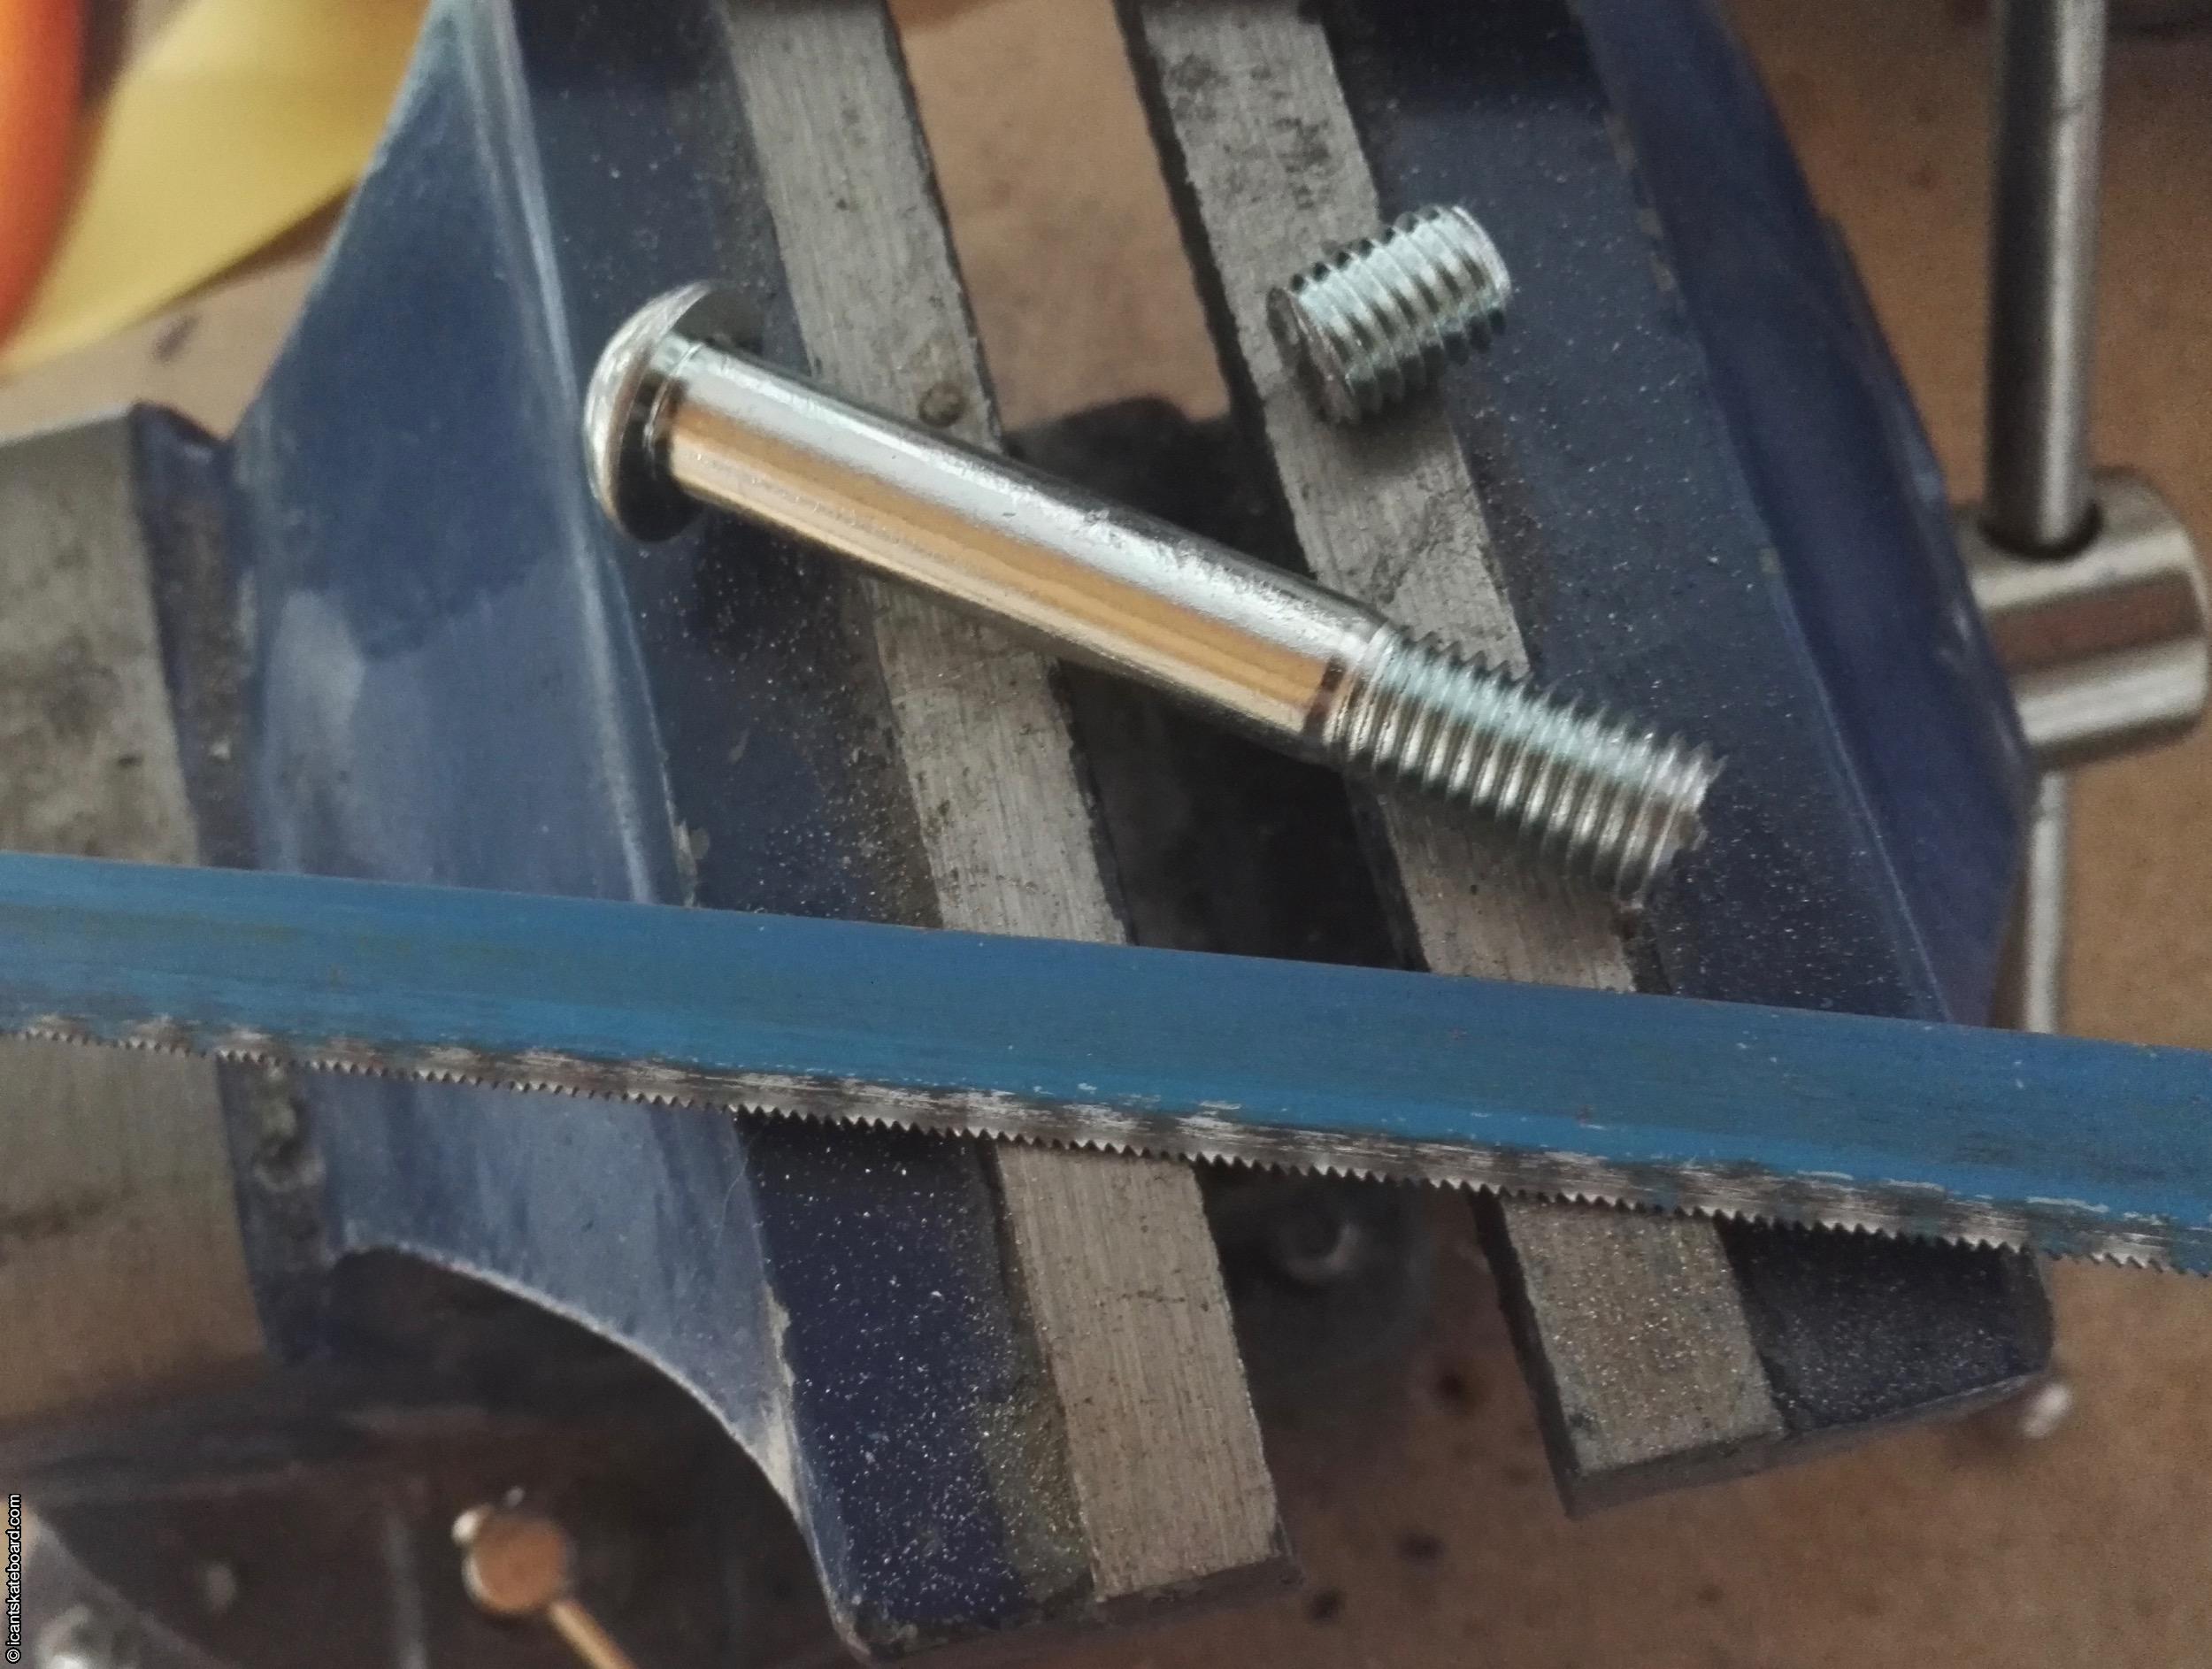
- Adjusting kingpin length. I’v bought a kingpin that is just a bit too long in order to get enough unthreaded length. So I had to cut it to size. I just used a metal hacksaw and my belt sander to smooth the end.
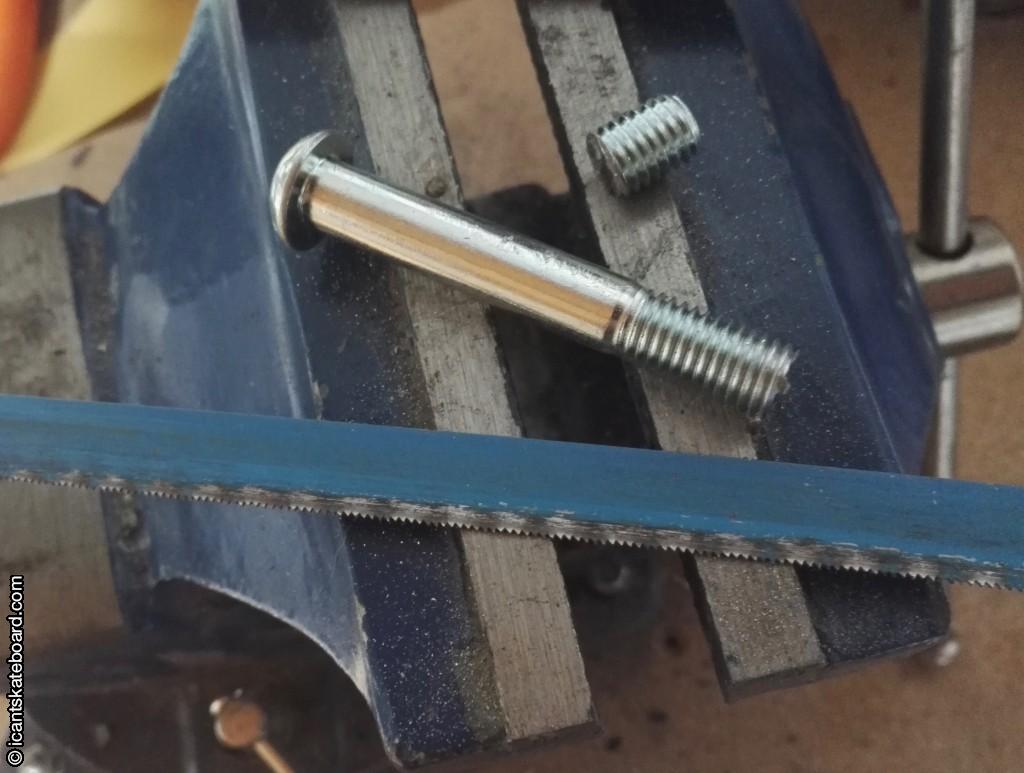
Adjusting its length took a few minutes, steel is hard. - Putting everything together. Now but everything back together, make sure to clean the part of any metal chips. Check if everything fit, you may have to fill your washers a little if their hole is too small. Once everything is reassembled check if nothing rattle and that the kingpin doesn’t stick out, board side as it could damage the deck.

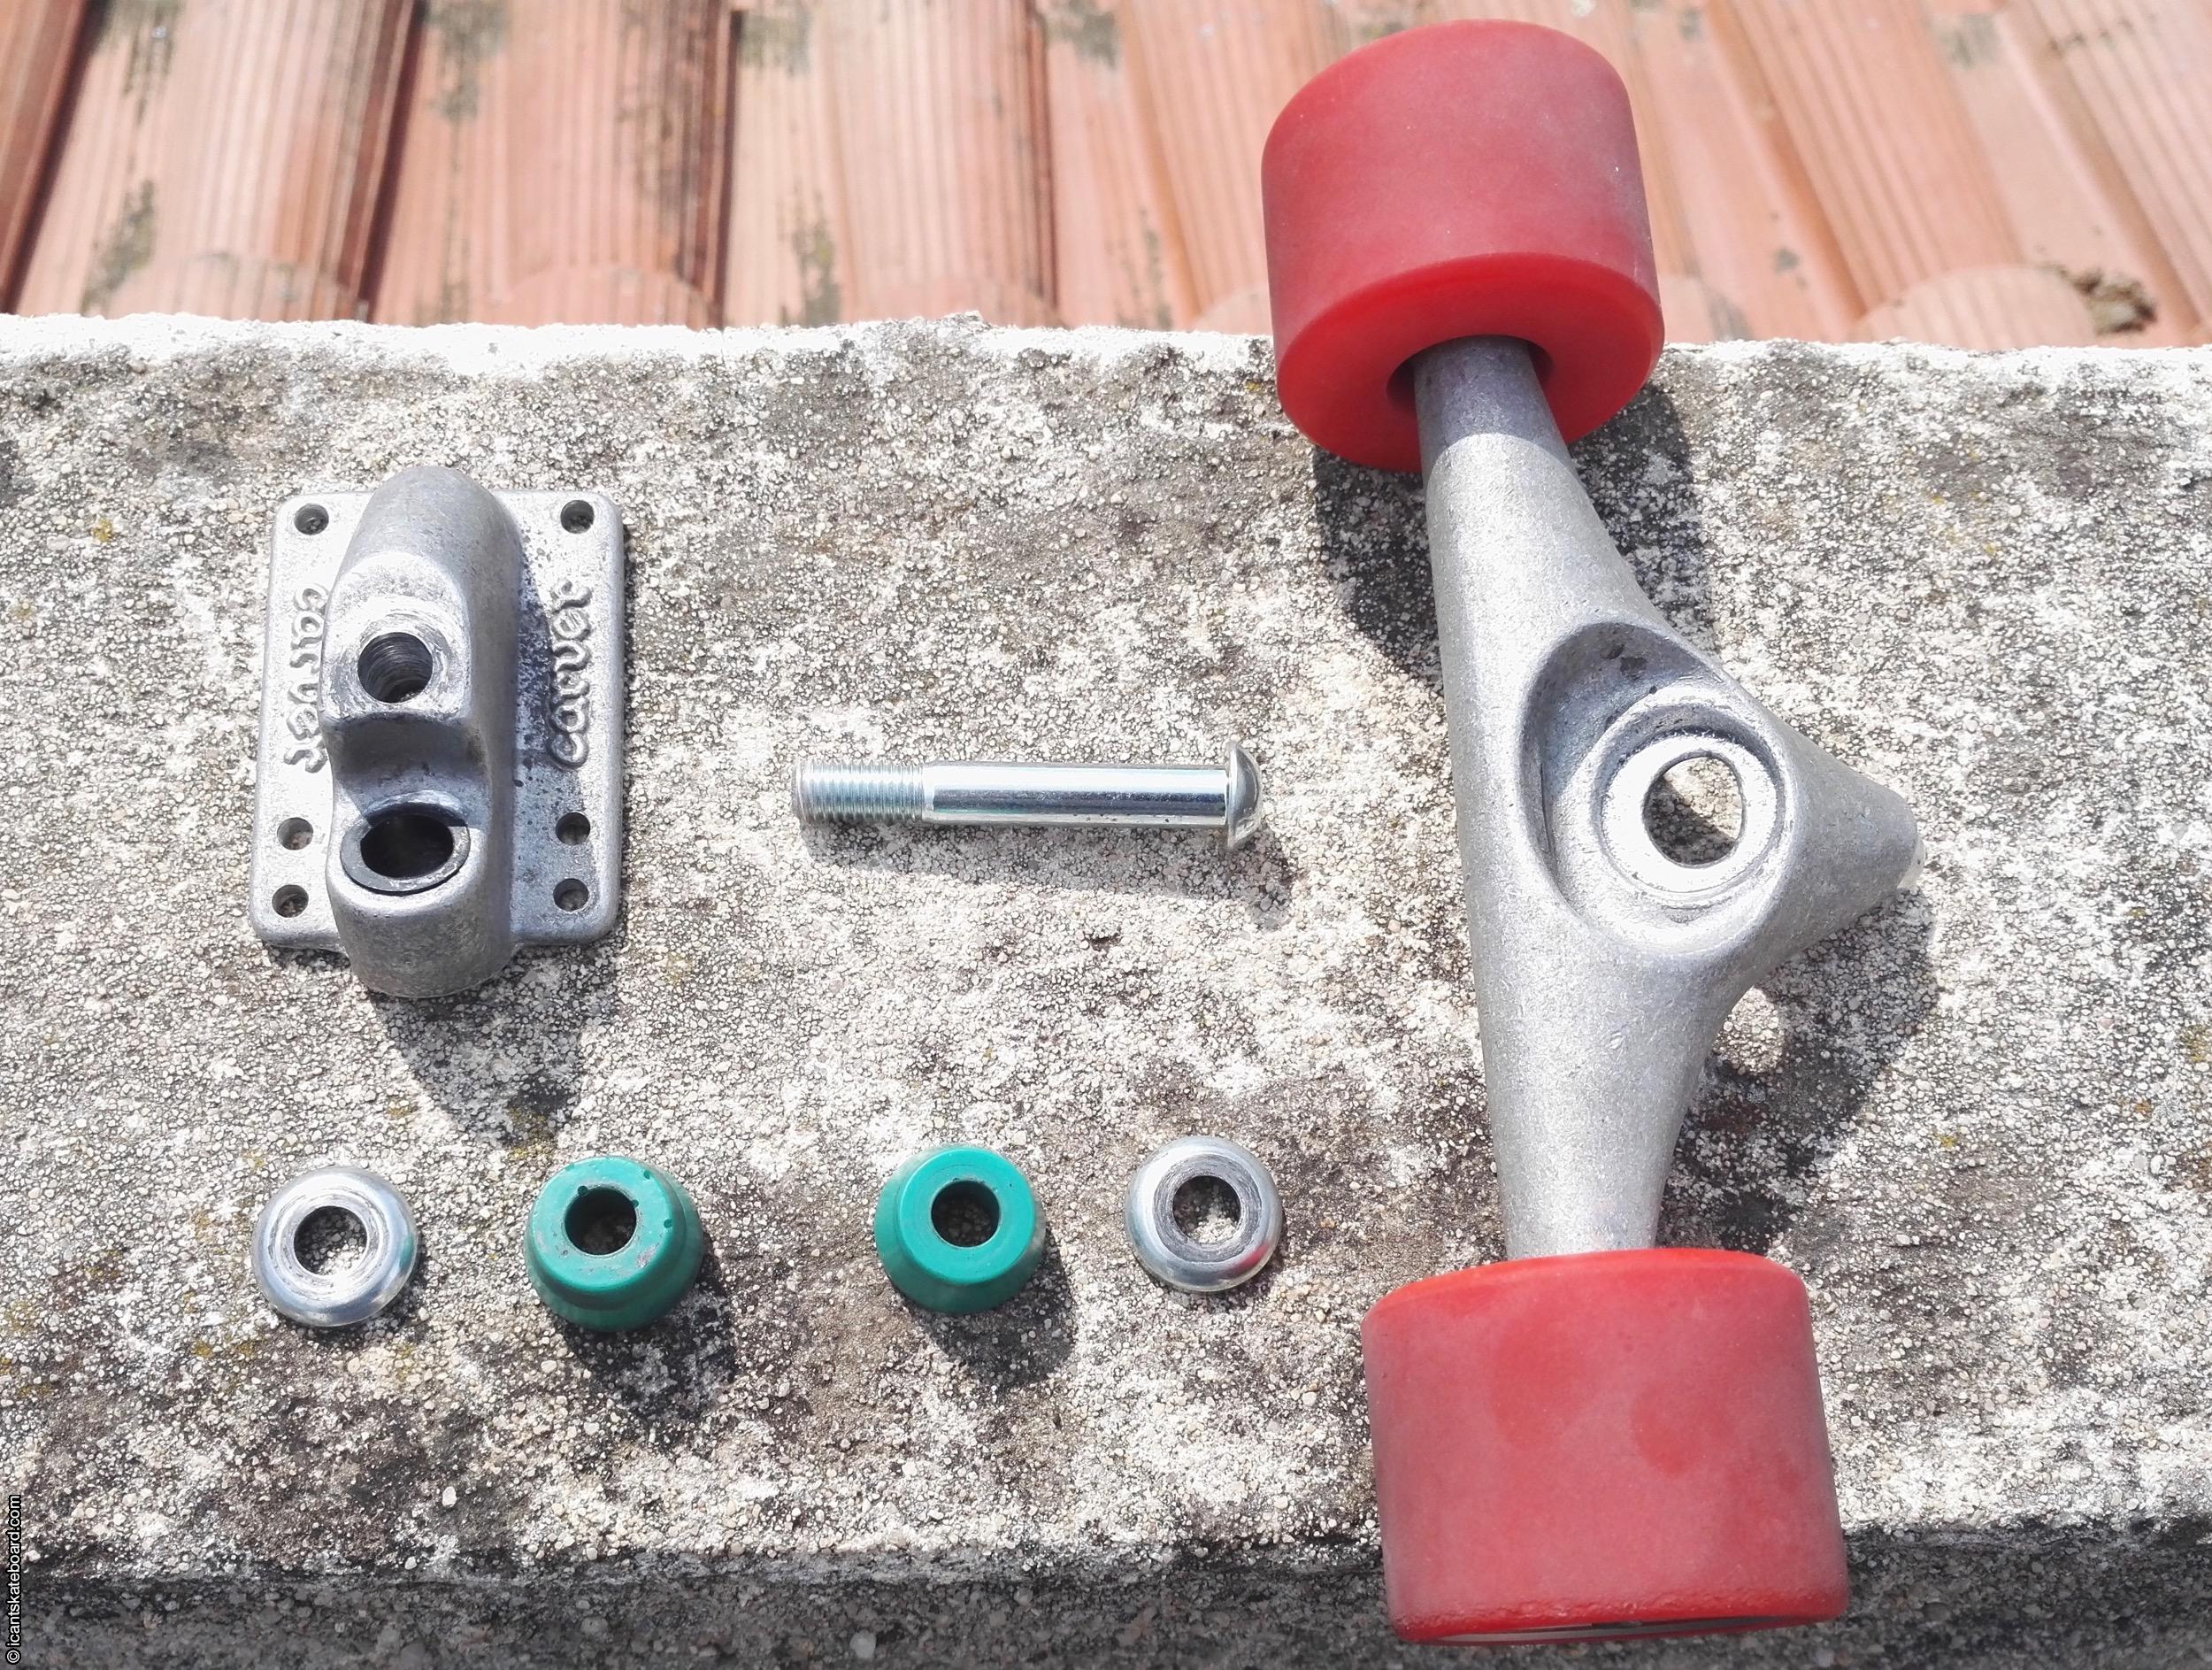
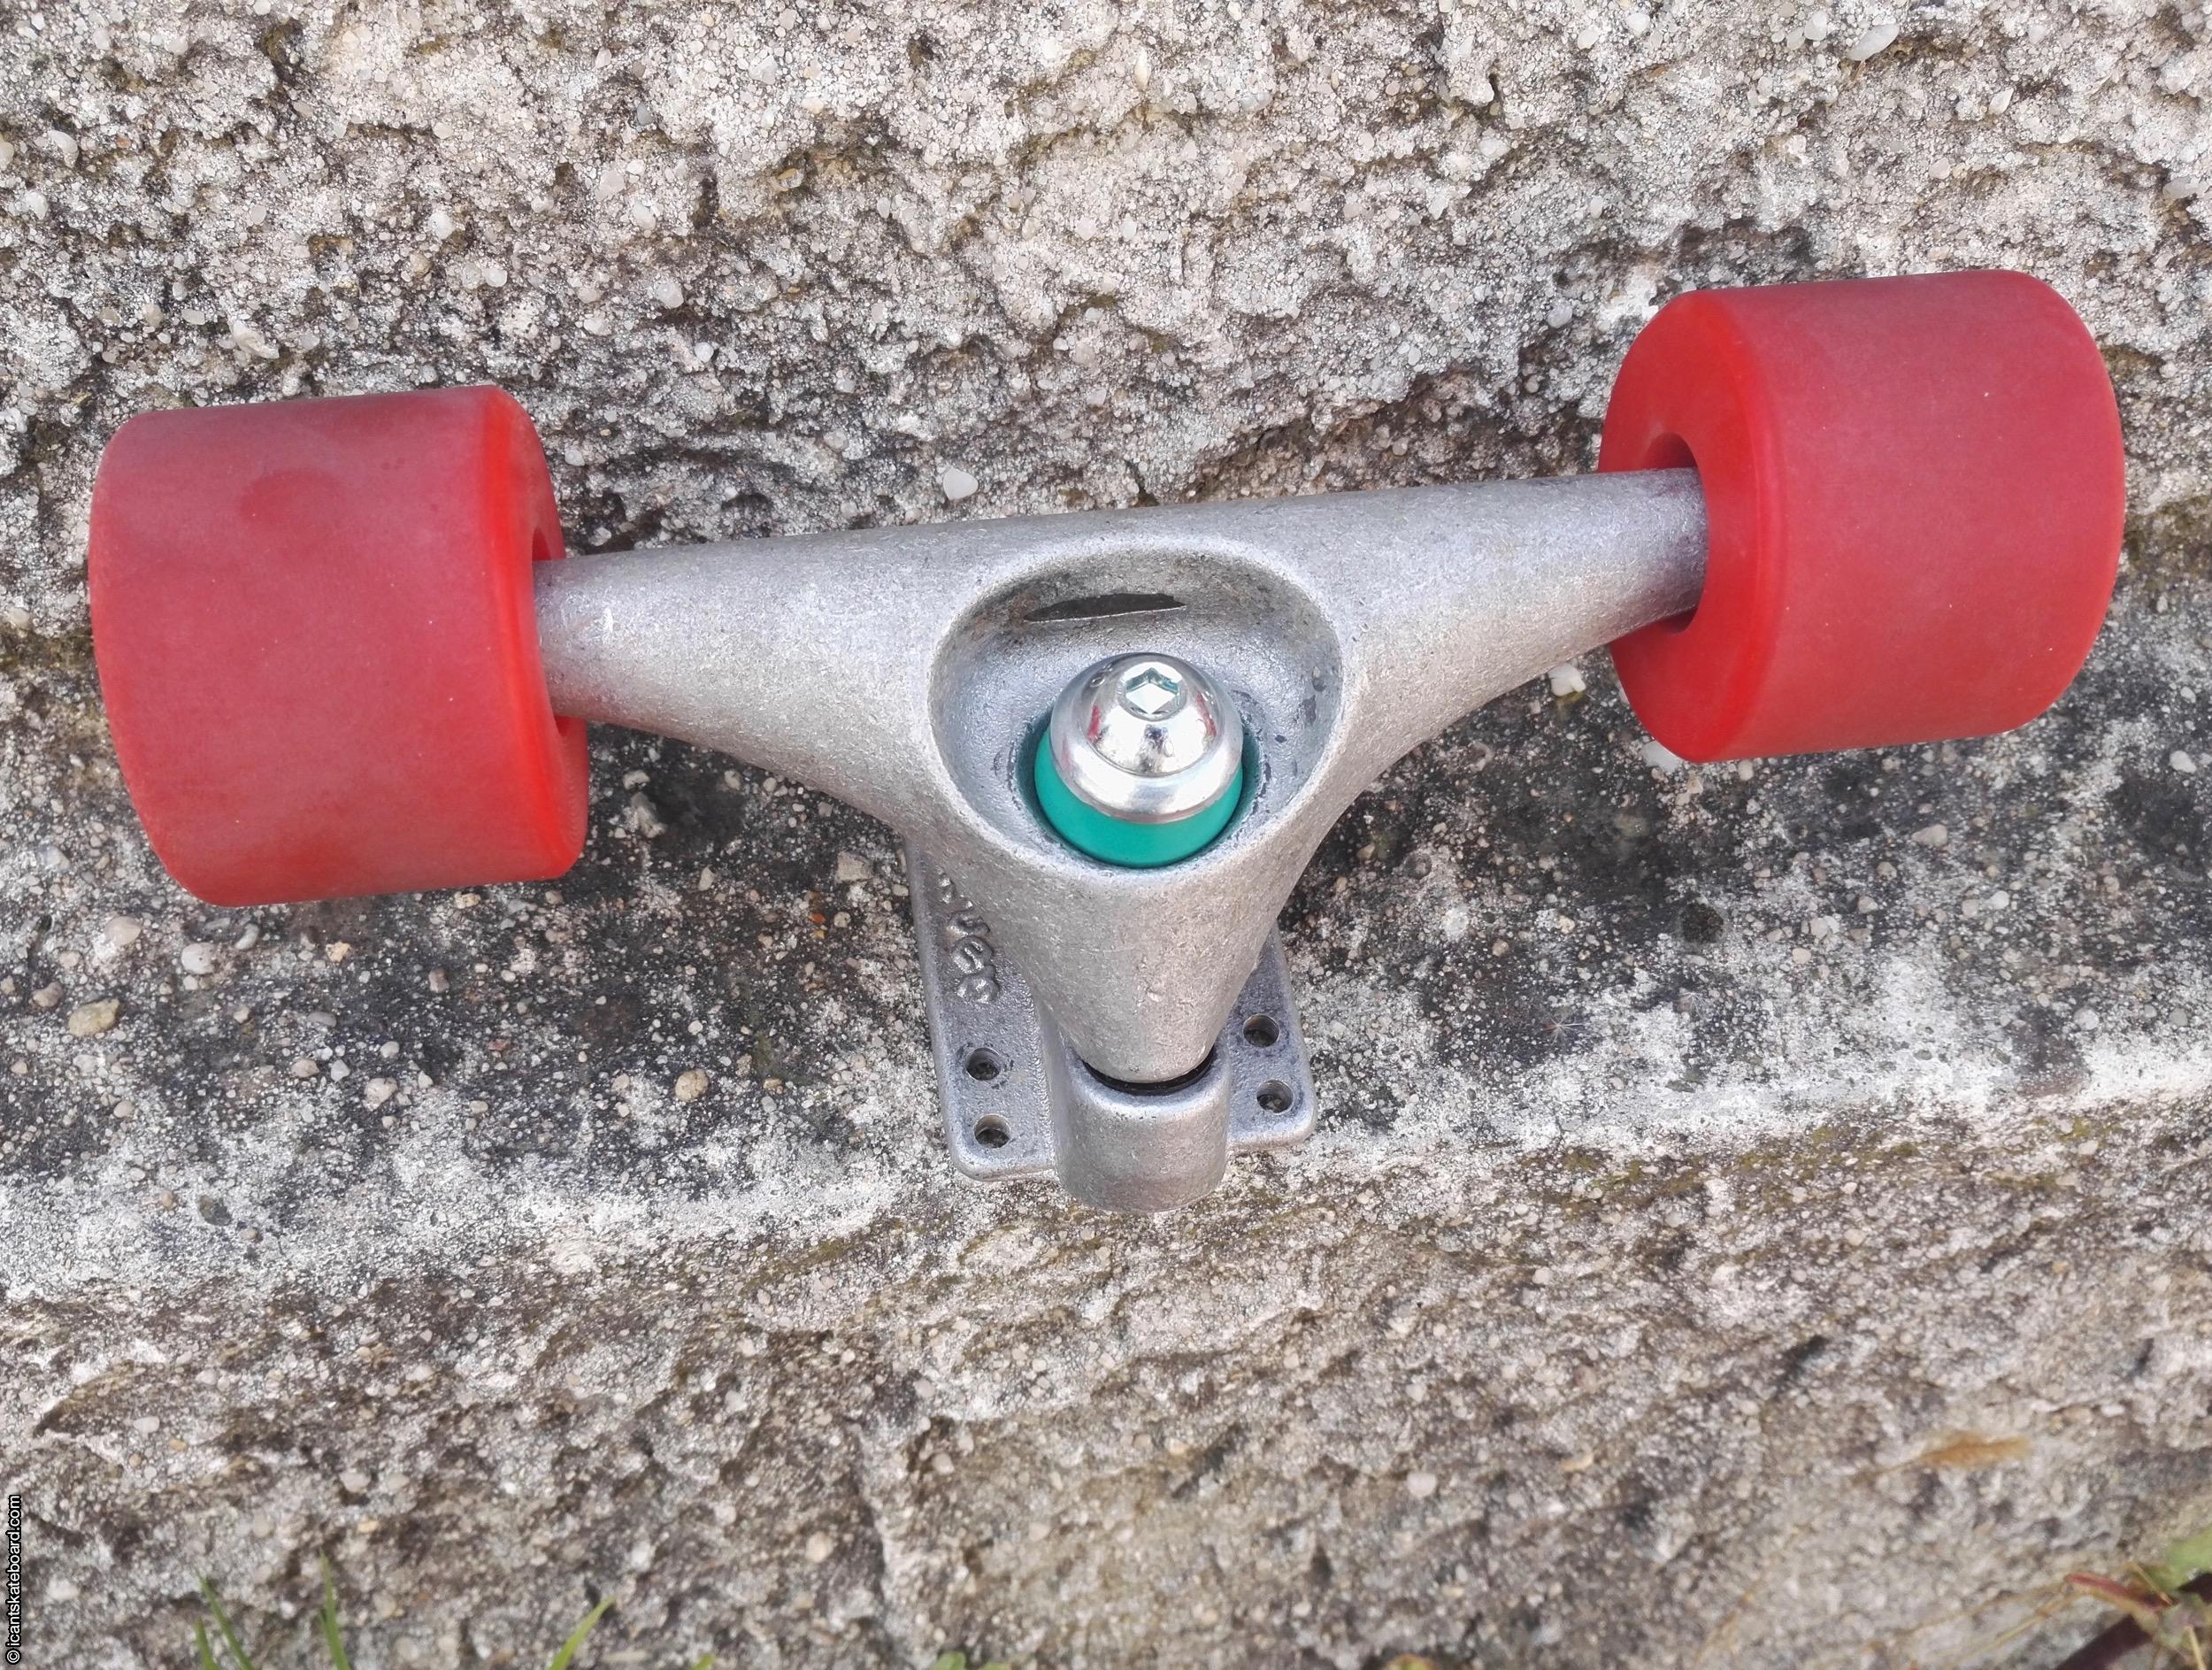
Now you can grind with your Carver CX truck and roll off curbs without the fear of getting stuck and falling forward. And as an added bonus, your kingpin is now stronger!
Amazing tutorial! I’ve been thinking about doing the same for ages!
I’ve also have a theory that you can get the same effect (a “dirtier” version) by reducing the “original” kingpin’s length and securing it with a “slimmer” nut. My thinking behind this is simple: the bolt is slightly peeking outside the nut and the nut itself could be slimmer. I can’t even consider any “structural” consequences… right?
I love my carver trucks, but I really don’t understand the logic behind this huge kingpin!
Thank you for your comment Ricardo.
The easiest way would be to simply reverse the kingpin so you don’t have to saw it off. I wouldn’t feel safe with a slimmer nut.
I think that the kingpin is that long because the full length is usable, for example when I’m ridding snake runs I sometime use my Carver CX with the nut so loose that the kingpin wouldn’t stick out of the nut, but that’s a personal choice and I understand that most people like their trucks a little more tight.
Anyway, if you do any kind of mod let me know ! And if you want to discuss more do not hesitate to message me on Twitter.
François
Very cool tutorial. The modification steps are very clear to understand and detailed. Congratulations.
Well, are you still riding your modified CX truck? How does it feels? Did you identified any flaw in your mod?
It would be nice if you could update the tutorial with a feedback after using it for a while.
Hi everyone, it’s my first pay a visit at this web page, and paragraph is in fact fruitful for me, keep up posting these
types of articles.
pokersoda website penipu
I have noticed you don’t monetize icantskateboard.com, don’t waste
your traffic, you can earn extra cash every month with new monetization method.
This is the best adsense alternative for any type of website (they approve all sites),
for more details simply search in gooogle: murgrabia’s tools
I like the idea of inverting the kingpin, but I don’t like the idea of not seeing how far the nut is when making further adjustments (the kingpin nut will be hidden inside the truck base)
I like the idea of inverting the kingpin, but I don’t like the idea of not seeing how far the nut is when making further adjustments (the kingpin nut will be hidden inside the truck base)